The Hook
TODO - update with Astro migration
What do I write on my first post under the “Tech Posts” section of this blog? It’s gotta be something tech related… And the only thing on my mind is this blog made with Jekyll. So I’ll write a little bit about my setup and Jekyll!
TODO - replace this with Astro migration, keep jekyll stuff
How these pages were built
Shout-out to Chad Baldwin, who’s blog I came across when I started searching on how to get this Jekyll thing up off the ground. He created a really cool bootstrapping github template that I planned on using, but I like to understand tools by messing with them myself.
His site was the inspiration for this one!
So I jumped over to Jekyll’s Install and got it installed on my Mac.
Speaking of my local machine, I do nearly all of my work on a steeply discounted Apple M1 Pro I picked up right when the M2 Pro released.

In the spirit of open source, I’ve been cross referencing Chad’s blog and the official Jekyll documentation.
Once I got everything installed, I kicked off the process with gem install jekyll and
got to creating!
Building the Blog
As soon as I had jekyll installed, I ran bundle exec jekyll serve. This created
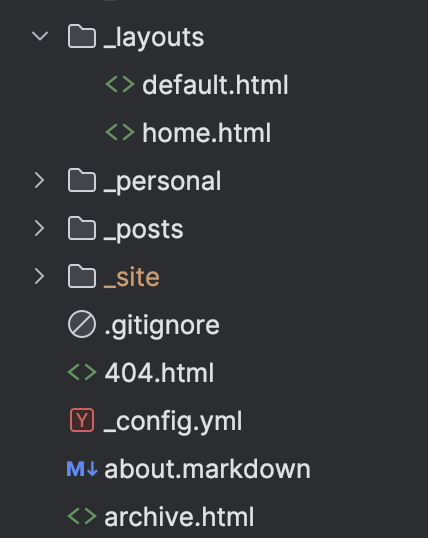
a _site and .jekyll-cache and started serving my site locally.
I quickly found myself in over my head at this point, and went through the step by step tutorial available on jekyll’s docs page
From there, I created a _layouts folder and set up the format I wanted by default (default.html), and for my home page (home.html).
The layout docs are right here

I followed the instructions in the Blogging section of the step-by-step and took some inspiration from Chad’s repository, and separated my posts into personal and tech.
As of this post, that’s where I am now!
I’ll be updating the site, and everything (including all my commits and history) will be available in the github repository that serves this site!